Posted on Leave a comment

Playing in the dirt on the micro-farm

Aloe shoots in the TPC garden
Rosemary in the TPC garden

We’ve been hard at work in the gardens so far this year. We ripped out more grass and flowering bulbs for planting edibles and built more boxes to grow in. The greenhouse was taken apart as our part of the world reached the 70s and we started moving everything from it out into the growing areas. Most of the plants made it through the winter here in Houston and we’ve spent the last few weekends in the booth, transplanting, evaluating what containers we have or want, or working the garden beds to get them ready.

Since we are the geeks that we are, planning the garden beds and containers is a multi-week event here. We literally pull out all seeds that we’ve gathered, purchased, or been gifted over winter and spread them over the table top. Then out comes notes of prior years gardening, our gardening books, Dorothy’s infamous gardening binder which is stuffed with info she’s saved over the years, and then pull up our favorite websites so we can learn about anything we’ve never grown before. We also grab little two to five inch plants for transplanting if needed. This year we hit a new geeky record as graph paper was pulled out and a diagram of the planting beds was made to scale! Yep, we literally mapped out where everything was going to be planted in the front beds on graph paper in hopes of keeping some sanity this time.

The back yard micro-farm area was planned mostly over the Christmas and New Year’s break as we cared for everything in the green house. The grape trellised wall will be back this year and this time we’ll try to keep it scaled back a bit. In past years we’ve honestly let it spread as far as it wanted but the massive crop was a bit much to handle last time! Just in case we accidentally get another harvest like that we’re plotting to learn wine making. We learned our family’s not big into jams & jellies, the kids can only devour so many pounds of grapes before they go bad, so wine making seems to be a logical next step for us. Would be a lot of fun to make wine out of our grapes and then make that wine into soap. We’ll see how it goes this year and keep you updated.

Freshly transplanted sage in the garden

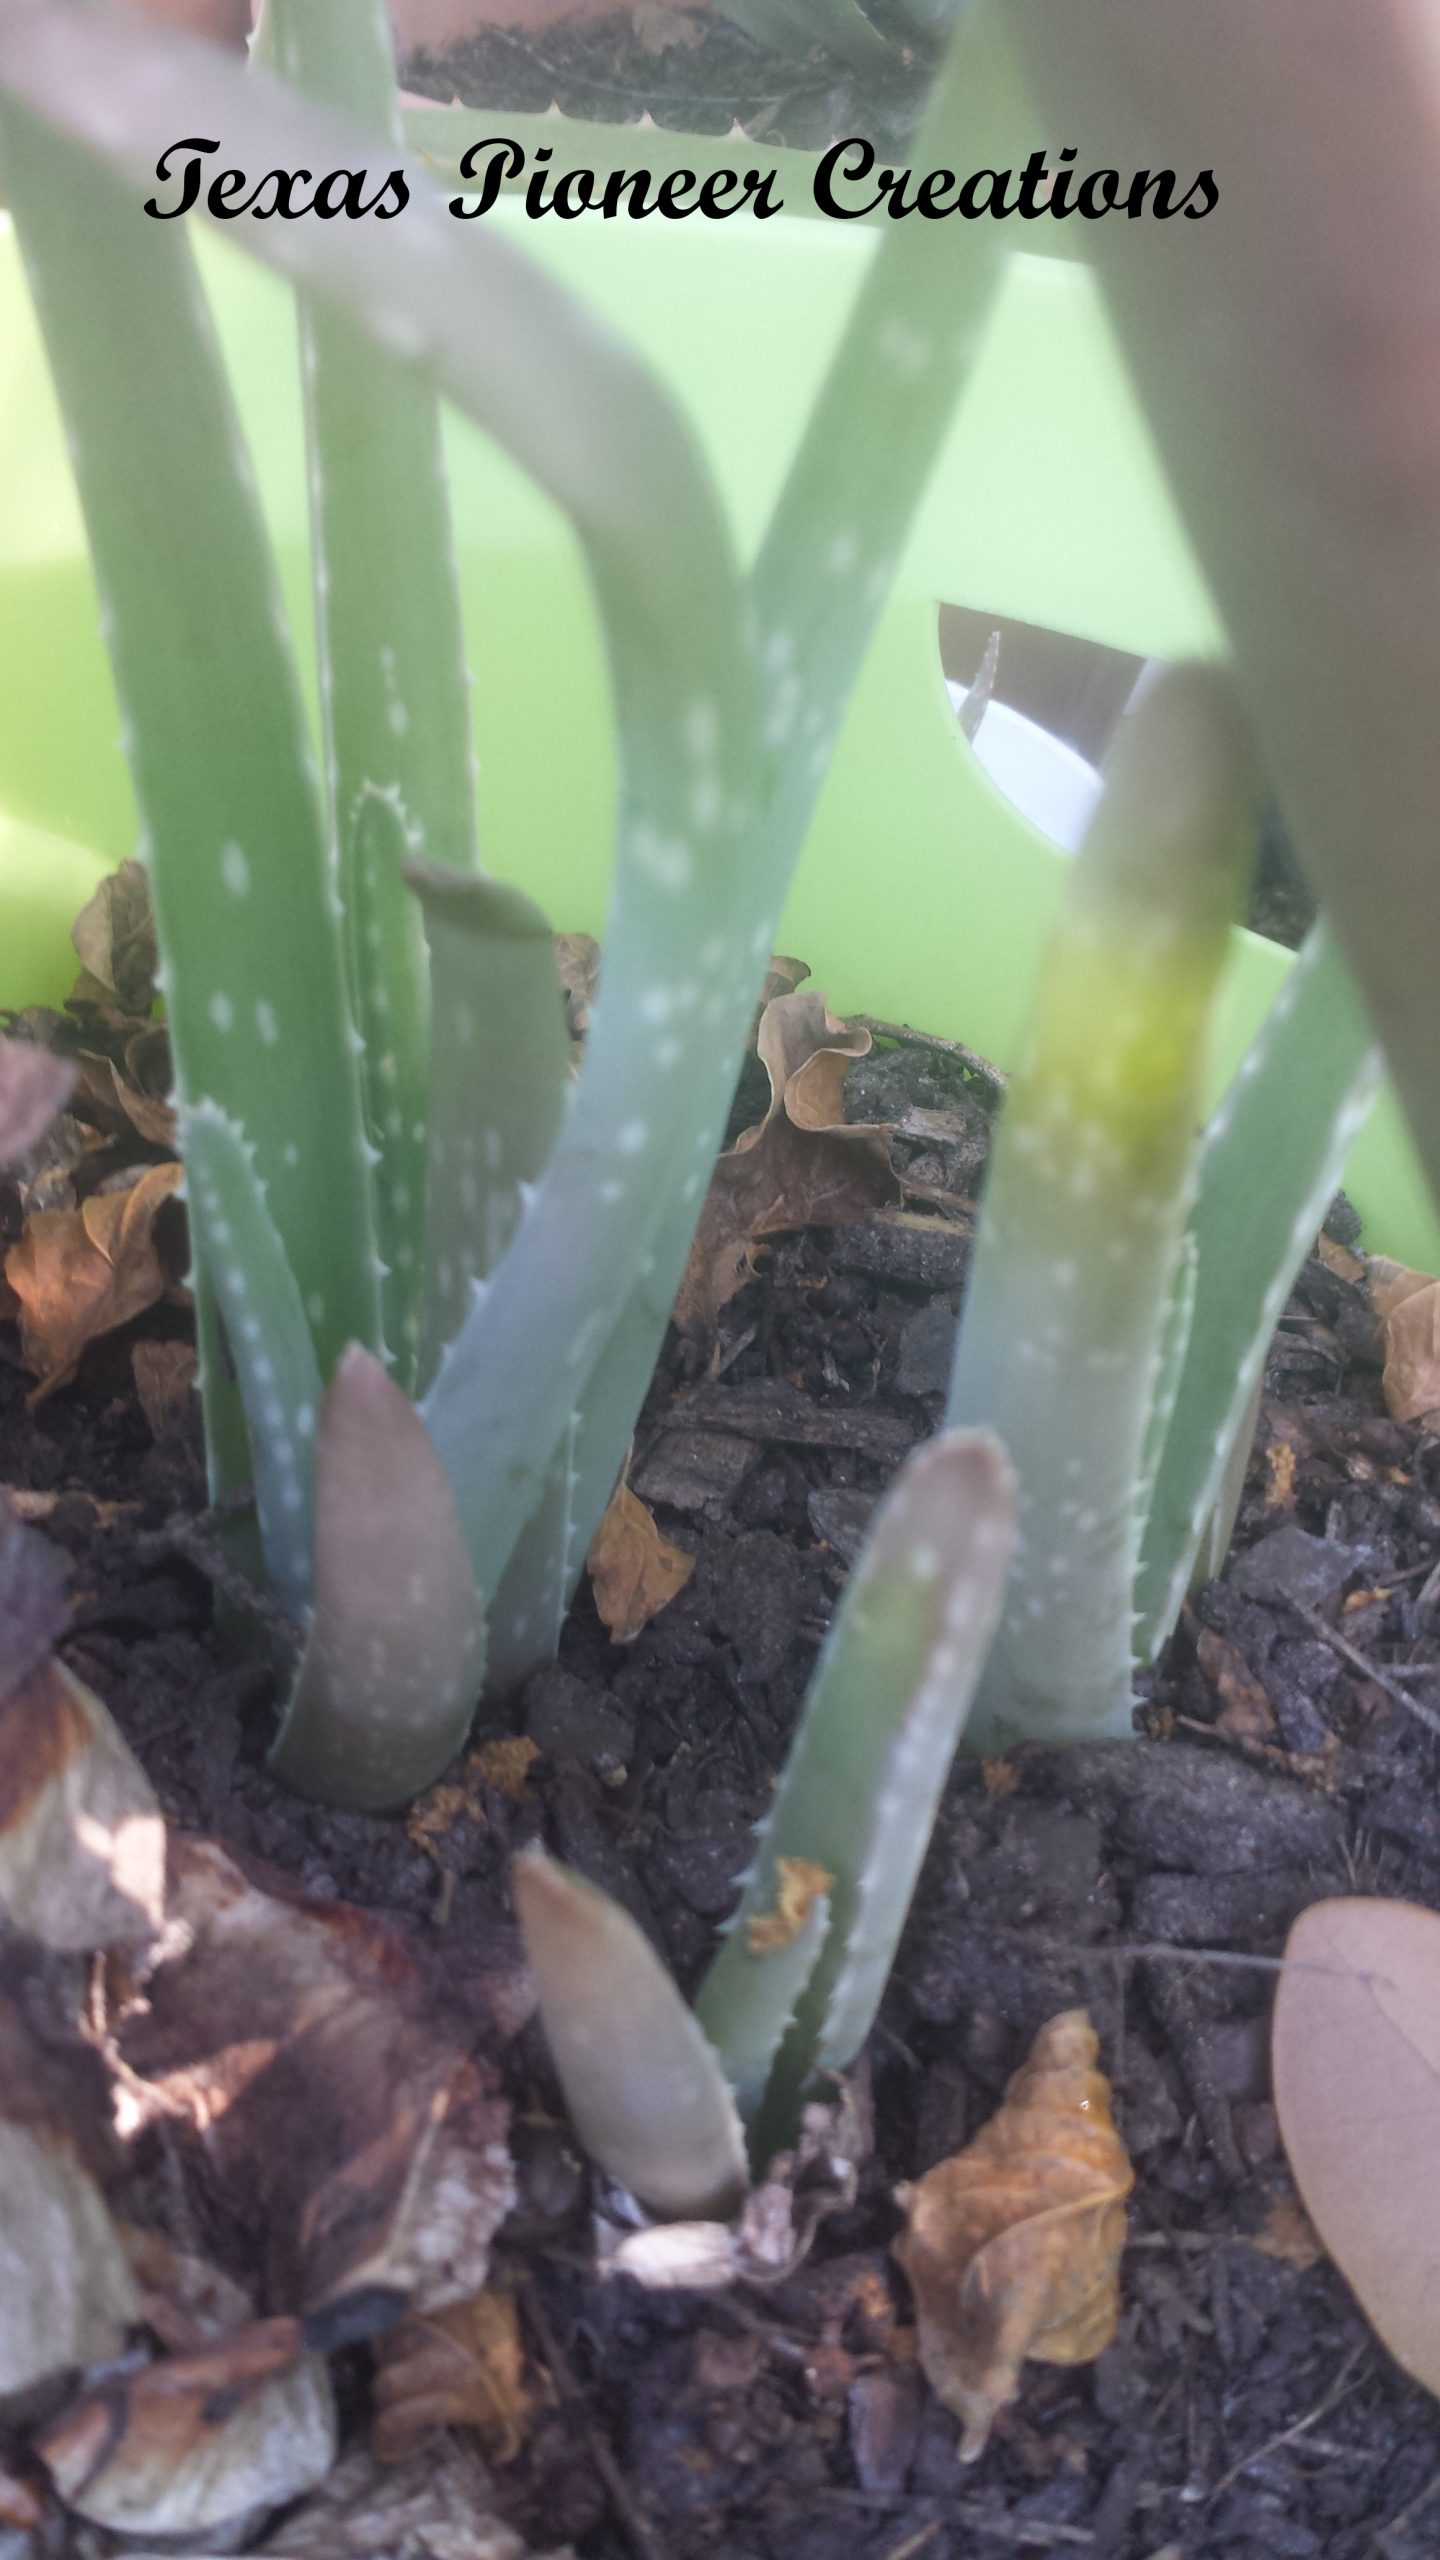
The fruit trees are in full swing, except for the plum tree which is driving Dorothy nuts. We lost our blueberry bushes but that was due to the dogs, not weather. All of the citrus trees are flowering and putting out new leaves and branches. The nectarine tree is covered in fruit while the fig tree is popping out leaves like crazy. Blackberry vines are awake and producing also; we’re anxiously awaiting those! We are keeping fingers crossed this year that our limes and grapefruit make it through. If all goes well, there should be produce in our booth at the farmer’s markets. We also expanded the herbs and veggies in our little growing patches with hopes to grow enough to share. The aloe is sending up shoots constantly and those should be split out soon to give away at markets also. Keep fingers crossed for us!

For those who worry, we have kept our pretty flowering plants too. We’re all fans of the pretty colors and varying flowers we’ve grown over the years. One gardenia was lost, not sure what killed it but it’s gone, and a rose bush we thought was destroyed has come back strong. The butterfly flowers (lantana, duranta, calendulas, coneflowers, daylilies, etc.) all seem to be doing well. We still have multiple varieties of roses everywhere too. The plumeria tree is showing signs of waking but will be a bit before any flowers might emerge. We love having these in both the front and back to bring in the bees.

Gardenia Blooming
Gardenia Blooming

We’ll be trying hard to keep better updates for everyone here online about our little micro-farm. We realized that in the past years, we’ve mostly shared info with people as they visited us in the booth and that’s not really helpful to everyone. It seems to be a bit surprising to people that we grow so much in our little corner of Houston, smack in the middle of a subdivision. It also seems to be a shock how much of our ingredients come from our own garden. Pictures will be added here to the blog and website in addition to our social media to keep you in the loop. And feel free to ask questions online or in person about what we’ve got growing. Odds are we’ll whip out our phones in the booth to share pictures of our little projects in addition to answering your online queries.

We must wrap it up for now as there are weeds to pull before the day ends. Stop by and say hello when we’re out in the market or we’ll see you here again soon. For easier updates, follow our blog and like us on Facebook to get alerts when the next post goes live or market days. Have a great time out there, stay safe, and happy washing!

One of our favorite bug killers in the TPC garden
Posted on Leave a comment

Beautiful blue failure

Blue colorant into soap base, ready to go

We admit it. We’re guilty of staring at beautiful soap pictures posted online by other soapers. We’ve wasted precious time wandering social media and pintrest admiring bright colors, gorgeous decorations, amazing designs and more from soap makers around the globe. We’ve gotten side tracked for a half hour in a conversation about what colors you get from infusing herbs into oils, how to mix them for pretty natural soaps, and longed to be the one with the amazing soaps everyone admires. But one day while working with a tempermental new fragrance, we realized how long it had been since we saw anyone spotlight the failed soaps. We’re going to fix that.

It’s no secret that all soap makers have failed batches. When we test new combinations of essential oils, fragrance or color samples, or an infusion we made of herbs & oils, we sometimes don’t get that wonderful bar of soap we imagined. I was testing a few new scents and colors this summer for a customer request and managed to get pictures of most of the process to share with you. What I didn’t know then was that I was documenting a really cool failure in the making. As you can see, I started with one of our tried and true recipes. All the oils were measured, melted, and combined as needed. Lye solution behaved as normal and everything mixed smoothly. I poured off a bit of straight soap base into the mold for a plain bottom and split the rest of the base into thirds. Everything was normal in my soapy world.

Adding blue and green colorants to separated soap bases

I whisked in a bit of green and blue colorants into two of the soap portions and then finished blending them in with a spatula. The kid in me still loves to swirl the colorant into the white and watch it disappear. These pictures were taken somewhere in the middle of me playing around. I took the uncolored reserved soap base, split it in two, and added the fragrances I was testing. They didn’t play very nicely once they were put into the soap base and I had to quickly get the soap into the mold. (I wasn’t really surprised that they seized up on me as the reviews on the fragrance had warned me.) I then turned back to the colored soap portions and started layering them over the uncolored soap layers in the mold. The plan was to get some sort of lightly swirled layer on the top of a white base with some parts dipping into the white. Unfortunately, I seemed to not have gotten the colored portions thick enough to get what I wanted and they flattened a bit.

Unmolding the next day was an interesting reveal. As you can see, the very bottom had a really neat unintentional swirl pattern in it. The seized scented portion was clean looking and a creamy color. The swirled area had green, light blue, and a touch of the darker blue scattered. The scent was non-existant in one log while the other was not pleasant and the entire batch had slight weeping in the bars. Visually, I had a soap that reminded me of a beach and was an unexpected happy sight. There was just no saving those scents at all and the weeping wasn’t helping. So I made my notes on the recipe log and set it aside to see if we could recover them. They eventually found their way to being rebatched. These pics below are from when I chopped them up and was putting the chunks into the crock. On a good side, I have great notes on working with those new colors and can get a beachy looking soap made. This wasn’t too bad of a failure.

This slideshow requires JavaScript.

Happy Washing!
Dorothy

Posted on Leave a comment

Unpredictable but pretty

Freshly cut tall bar of St Arnold hot process batch in the morning

There are many methods for making soap and we have played with almost all of them at this point in our soap life. If you’ve ever considered making soap or listened to a soaper geek out, you’ve probably heard of at least one or two ways we cook. Hot process, cold process, melt and pour, castile, room temp, pioneer, polished or natural, vegan, cruelty free, silk infused, organic, traditional, the list of possibilities goes on and on. Some people will only play with cold processed soaps, others preferring to avoid lye use melt and pour bases, and there are those who literally swoon over the rustic look of hot process soaps. (Yes, we’ve really seen that happen in the booth.) We here have our personal preferences too but have always made it a rule that we will do whatever we can to make someone’s soapy idea come to life. One of the benefits of this rule is that we get to experiment on a regular basis and embrace the variety of results we get. This time we’re looking at hot process soaps and occasionally unpredictable visual effects.

Freshly cut hot process St Arnold beer soap

Hot process soaps are on our “instant gratification” list of soap making. (Hot process simply means heat is applied to the soap base after the lye has been incorporated. It is also used in rebatching soaps.) It can be made and completely cleaned up after in one day, results are useable as soon as they’re cool enough to touch, and it doesn’t seem to burn off essential oils as much in our experience. As a bonus, you get great unique looks with hot process soaps. This picture is from a log we finished last week in a tall mold. The rough, rustic look to the exterior is very common to a hot process log but it’s the interior that made Dorothy smile.

Oversized bar of St Arnold hot process soap and side view of log

The swirls and loops that you see in this picture were not entirely created by our hands. We took a completed but off-sized log of our St Arnold soap, chopped it up, added a bit more of a new base, and cooked it up together. The St. Arnold recipe we use can behave a bit unpredictably at times when we cook it this way so we never seem to get any two batches that look exactly the same when we cut them open. It will pour almost like a thick cold process batter or it may seize up and have to be forced into the mold. Cooking time variances of about ten minutes will give us some fun effects too. It can something as simple as the change of humidity in the soap room on the day we made it that will make a change in the appearance. Sometimes, like the picture below, we even manage to get some wide variety of swirling width within the same batch of soap or individual bar. It’s unpredictable but can be very pretty in the end.

Closer view of rustic looking top and crazy swirled pattern

The glassy smooth exterior of this batch reminds us of obsidian in some of the Hawaiian pictures. The interior colors will darken a bit more before these guys will be ready to go home with anyone but it should still keep the similar look of varying browns. The guys in the soap room say it reminds them of a stone or petrified wood. What do you think of the pattern? We’ll keep debating it here until they go into the booth in October. You’ll be able to find them for sale on the website with the other beer soaps.